> ## Documentation Index
> Fetch the complete documentation index at: https://docs.niro.cx/llms.txt
> Use this file to discover all available pages before exploring further.
# Quickstart
> Connect your first k3s cluster, confirm live health, and deploy an app through Niro in under 5 minutes.
## Connect your first cluster
Start with a real cluster and a safe default: the Niro agent enrolls read-only, calls home over outbound HTTPS, and begins sending live fleet context without opening public ports.
 Any k3s installation works. A single-node homelab cluster is enough.
Run the installer from a machine that can apply resources to the cluster.
[Start free](https://app.niro.cx/signup). No credit card required for the first cluster.
## Enroll the agent
Sign in to [app.niro.cx](https://app.niro.cx) and choose **Add cluster** from the fleet view.
Give the cluster a name like `homelab`, `edge-site-01`, or `customer-prod-1`, then choose its [environment](/concepts/environments). Niro generates a single-use enrollment token.
Copy the command from the dashboard and run it with `kubectl` access to the target cluster:
```bash theme={"theme":{"light":"github-light","dark":"vesper"}}
curl -fsSL https://get.niro.cx/install.sh | NIRO_TOKEN= sh
```
The installer creates the `niro-system` namespace, applies read-only RBAC, deploys the agent, and stores the long-lived cluster key inside the cluster.
The enrollment token is single-use and expires in 1 hour. Regenerate it from cluster settings if the install window expires.
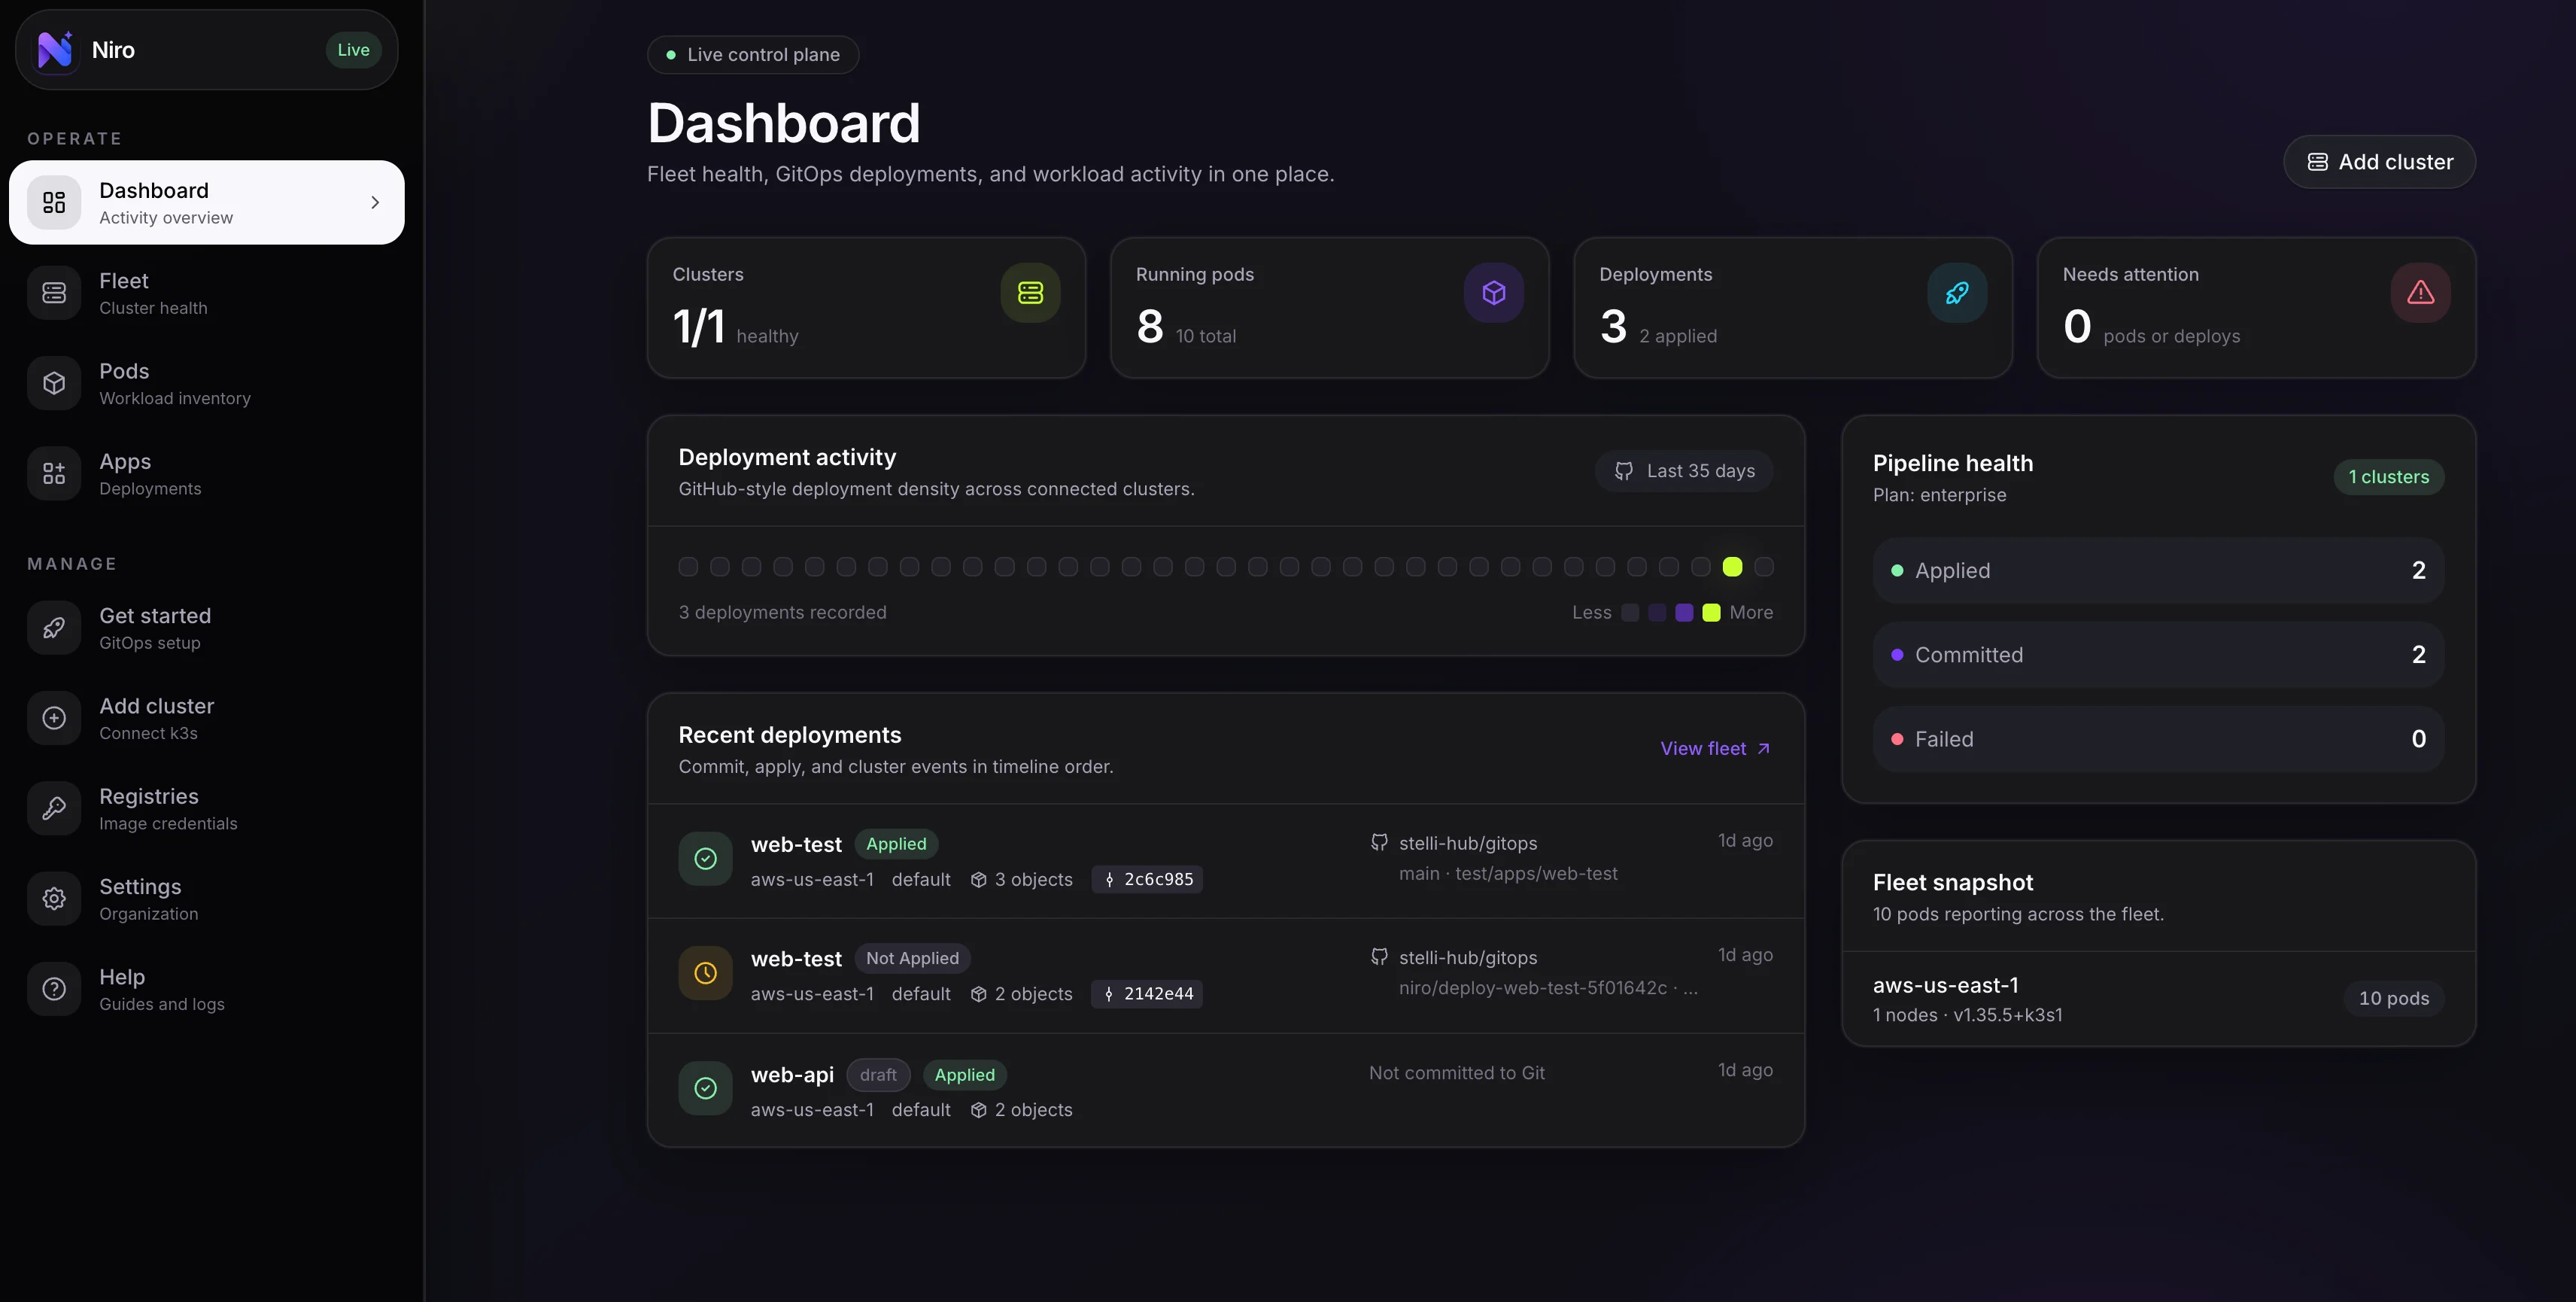
Return to the dashboard. Within about 15 seconds, your cluster should show a fresh heartbeat, node count, pod inventory, and health state.
The cluster is connected when it shows a green **Healthy** badge and a recent **last heartbeat** timestamp.
## Deploy your first app
Niro gives you two delivery paths. Use the visual builder for a fast first deploy, then move production remediation through Git when your workflow needs review gates.
The visual builder turns application settings into Kubernetes manifests and shows policy findings before you apply.
The agent starts read-only. Re-run the installer with apply enabled before deploying workloads:
```bash theme={"theme":{"light":"github-light","dark":"vesper"}}
curl -fsSL https://get.niro.cx/install.sh | NIRO_ENABLE_APPLY=1 sh
```
In the dashboard, go to **Apps** → **Deploy app**, then select your cluster.
Enter the container image, ports, environment variables, resource limits, and private registry settings if needed.
Click **Apply to cluster**. Niro sends the generated manifests to the agent and shows per-object results within seconds.
Continue with [Deploy an App](/guides/deploy-app) for the full walkthrough.
GitOps keeps fixes reviewable. Niro reviews manifest risk, comments on pull requests, and applies the approved state after merge.
Go to **Integrations** → **GitHub** and create the Niro GitHub App.
Choose the repo, branch, and folder path that owns the cluster manifests.
Push manifest changes and open a PR. Niro reviews the diff, surfaces policy findings, and applies the merged state automatically.
Continue with [Set Up GitOps](/guides/gitops) for the full workflow.
## Enable optional capabilities
Capabilities are explicit so cluster owners decide exactly what Niro can do.
```bash Live logs theme={"theme":{"light":"github-light","dark":"vesper"}}
curl -fsSL https://get.niro.cx/install.sh | NIRO_ENABLE_LOGS=1 sh
```
```bash Apply manifests theme={"theme":{"light":"github-light","dark":"vesper"}}
curl -fsSL https://get.niro.cx/install.sh | NIRO_ENABLE_APPLY=1 sh
```
```bash Logs and apply theme={"theme":{"light":"github-light","dark":"vesper"}}
curl -fsSL https://get.niro.cx/install.sh | NIRO_ENABLE_LOGS=1 NIRO_ENABLE_APPLY=1 sh
```
Each capability appears in the dashboard after the next heartbeat. See [Agent Capabilities](/reference/agent-capabilities) for the complete matrix.
## What's next?
Use cluster health, pod inventory, and timelines to understand operations across environments.
View live logs from any enabled cluster directly in the browser.
Get notified when incidents fire and trigger AI investigations on Pro.
Pull private images with scoped registry credentials and image pull secret injection.
Any k3s installation works. A single-node homelab cluster is enough.
Run the installer from a machine that can apply resources to the cluster.
[Start free](https://app.niro.cx/signup). No credit card required for the first cluster.
## Enroll the agent
Sign in to [app.niro.cx](https://app.niro.cx) and choose **Add cluster** from the fleet view.
Give the cluster a name like `homelab`, `edge-site-01`, or `customer-prod-1`, then choose its [environment](/concepts/environments). Niro generates a single-use enrollment token.
Copy the command from the dashboard and run it with `kubectl` access to the target cluster:
```bash theme={"theme":{"light":"github-light","dark":"vesper"}}
curl -fsSL https://get.niro.cx/install.sh | NIRO_TOKEN= sh
```
The installer creates the `niro-system` namespace, applies read-only RBAC, deploys the agent, and stores the long-lived cluster key inside the cluster.
The enrollment token is single-use and expires in 1 hour. Regenerate it from cluster settings if the install window expires.
Return to the dashboard. Within about 15 seconds, your cluster should show a fresh heartbeat, node count, pod inventory, and health state.
The cluster is connected when it shows a green **Healthy** badge and a recent **last heartbeat** timestamp.
## Deploy your first app
Niro gives you two delivery paths. Use the visual builder for a fast first deploy, then move production remediation through Git when your workflow needs review gates.
The visual builder turns application settings into Kubernetes manifests and shows policy findings before you apply.
The agent starts read-only. Re-run the installer with apply enabled before deploying workloads:
```bash theme={"theme":{"light":"github-light","dark":"vesper"}}
curl -fsSL https://get.niro.cx/install.sh | NIRO_ENABLE_APPLY=1 sh
```
In the dashboard, go to **Apps** → **Deploy app**, then select your cluster.
Enter the container image, ports, environment variables, resource limits, and private registry settings if needed.
Click **Apply to cluster**. Niro sends the generated manifests to the agent and shows per-object results within seconds.
Continue with [Deploy an App](/guides/deploy-app) for the full walkthrough.
GitOps keeps fixes reviewable. Niro reviews manifest risk, comments on pull requests, and applies the approved state after merge.
Go to **Integrations** → **GitHub** and create the Niro GitHub App.
Choose the repo, branch, and folder path that owns the cluster manifests.
Push manifest changes and open a PR. Niro reviews the diff, surfaces policy findings, and applies the merged state automatically.
Continue with [Set Up GitOps](/guides/gitops) for the full workflow.
## Enable optional capabilities
Capabilities are explicit so cluster owners decide exactly what Niro can do.
```bash Live logs theme={"theme":{"light":"github-light","dark":"vesper"}}
curl -fsSL https://get.niro.cx/install.sh | NIRO_ENABLE_LOGS=1 sh
```
```bash Apply manifests theme={"theme":{"light":"github-light","dark":"vesper"}}
curl -fsSL https://get.niro.cx/install.sh | NIRO_ENABLE_APPLY=1 sh
```
```bash Logs and apply theme={"theme":{"light":"github-light","dark":"vesper"}}
curl -fsSL https://get.niro.cx/install.sh | NIRO_ENABLE_LOGS=1 NIRO_ENABLE_APPLY=1 sh
```
Each capability appears in the dashboard after the next heartbeat. See [Agent Capabilities](/reference/agent-capabilities) for the complete matrix.
## What's next?
Use cluster health, pod inventory, and timelines to understand operations across environments.
View live logs from any enabled cluster directly in the browser.
Get notified when incidents fire and trigger AI investigations on Pro.
Pull private images with scoped registry credentials and image pull secret injection.